The secret is not just the sprayer; it is the prep.
Furniture has edges, corners, drawers, legs, hardware holes, old finishes, and little problem areas that can show through paint if you skip the boring steps.
Clean it, sand it, prime it when needed, and spray light coats; that is where the good finish comes from.
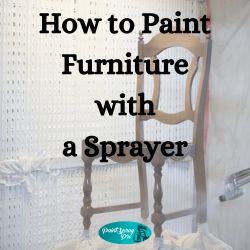
Painting furniture with a sprayer is one of the easiest ways to get a smooth, clean finish without brush marks. Whether you are updating a dresser, nightstand, table, chair, cabinet, bookshelf, or thrift store find, a paint sprayer can help the piece look more polished and less like a rushed weekend project.
Why Use a Paint Sprayer for Furniture?
A paint sprayer is great for furniture because it applies paint in a fine, even mist. This can make the finished piece look smoother than brushing or rolling, especially on detailed furniture with curves, trim, spindles, grooves, or raised panels.
A sprayer can also save time once everything is set up. Brushing around chair legs, drawer fronts, table aprons, and decorative edges can be slow. With a sprayer, you can move around the piece and cover those areas more evenly.
The tradeoff is that spraying requires more setup. You need to protect nearby surfaces, test your spray pattern, and clean the sprayer as soon as you are finished. Still, for many DIY furniture projects, the smoother finish is worth the extra prep.
What Type of Paint Sprayer Works Best for Furniture?
For most DIY homeowners, an HVLP sprayer is usually the easiest choice for furniture. HVLP sprayers offer good control and are often easier to manage on smaller projects like chairs, dressers, cabinets, side tables, and shelves.
A handheld sprayer can also work well for furniture, especially if you are painting one or two pieces at a time. The downside is that the paint cup may need refilling, and the sprayer can feel heavier as you work.
An airless sprayer can be used for furniture, but it is usually better suited for larger pieces or bigger projects. Airless sprayers apply paint quickly, so beginners need to be careful not to overload the surface.
No matter which sprayer you use, read the paint label and sprayer manual before you start. Some paints need thinning; some do not. Some sprayers need a specific tip or nozzle for furniture style finishes.
Choose the Right Paint
Furniture takes more wear than wall decor, so choose a paint that can handle touching, wiping, and everyday use. Cabinet paint, furniture paint, enamel paint, acrylic paint, chalk style paint, and some all surface paints can all work, depending on the look you want.
For a smoother finish, choose paint that levels well and is approved for sprayer use. If the paint is too thick, the sprayer may spit, sputter, or leave orange peel texture. If it is too thin, it may run or look patchy.
Always strain the paint before adding it to the sprayer cup. A simple disposable paint strainer can catch dried bits or small clumps that would otherwise clog the nozzle.
Remove Hardware and Take the Furniture Apart
Before painting, remove knobs, pulls, hinges, drawer slides, cushions, glass, or any pieces you do not want painted. Place screws and small parts in a container or bag so they do not disappear halfway through the project.
If the furniture has drawers, remove them and paint them separately. This makes it much easier to spray the drawer fronts evenly and avoid paint buildup around the edges.
For chairs, tables, and shelves, look for parts that can be separated safely. The more access you have to each surface, the easier it is to get an even coat.
Clean the Furniture First
Furniture can hold dust, wax, grease, fingerprints, furniture polish, kitchen grime, and old cleaning residue. Paint does not stick well to a dirty surface, so cleaning is one of the most important steps.
Use a mild cleaner or degreaser that fits the surface. Wipe the piece thoroughly, paying extra attention to edges, drawer fronts, tabletops, arms, and any spots that people touch often.
Let the furniture dry completely before sanding. If moisture or cleaner residue is left behind, it can interfere with primer and paint.
Sand the Surface
Sanding helps the paint grip. You do not always need to remove every bit of the old finish, but you do need to dull shiny surfaces and smooth rough spots.
For most furniture, a medium to fine grit sanding sponge works well. Sand glossy areas until they look dull. Feather out chipped paint or rough edges so they do not show through the new finish.
After sanding, remove all dust. Vacuum the piece if needed, then wipe it with a clean lint free cloth or tack cloth. Dust left on the surface can create bumps in the paint and make the finish feel gritty.
Repair Small Damage
Before priming or painting, check for dents, scratches, loose veneer, cracks, and missing corners. Small repairs are much easier before paint goes on.
Use wood filler for small holes, chips, or deep scratches. Let it dry, then sand it smooth. If a drawer front or tabletop has rough areas, take the time to fix them now.
Paint can make furniture look fresh, but it does not hide everything. In fact, a smooth sprayed finish can make dents and rough patches more noticeable if you skip repairs.
Prime When Needed
Primer is not always required, but it is often a smart choice.
Use primer if the furniture is glossy, stained, dark, raw wood, previously painted with an unknown finish, or likely to bleed through. Wood tannins, old stain, knots, and dark finishes can sometimes discolor your new paint if you skip primer.
Primer also helps with adhesion. If you are painting laminate, slick factory finish, or previously varnished furniture, choose a bonding primer that is made for difficult surfaces.
Let the primer dry fully before painting. If the primer feels rough, lightly sand it smooth and wipe away the dust.
Set Up a Spray Area
Spraying furniture is easier when you create a proper work area. A garage, covered patio, driveway, or workshop can work well as long as you can control overspray and dust.
Use drop cloths, plastic sheeting, cardboard, or a portable spray shelter to protect the area around the project. Raise the furniture off the ground if possible. Painter’s pyramids, scrap blocks, or a sturdy work table can make it easier to spray edges and legs.
Avoid spraying near cars, open windows, outdoor furniture, or anything you do not want misted with paint. Overspray travels farther than you think.
Test the Spray Pattern
Before spraying the furniture, test the sprayer on cardboard or scrap wood. This step helps you see whether the paint is flowing evenly.
You want a smooth, consistent spray pattern without sputtering, heavy edges, or large droplets. If the pattern looks uneven, check the nozzle, tip, paint thickness, and sprayer settings.
Practice moving at a steady pace. Keep the sprayer the same distance from the surface and overlap each pass slightly. A few minutes of practice can prevent runs, stripes, and uneven coverage on the actual furniture.
Spray Light, Even Coats
The biggest beginner mistake is spraying too much paint at once. A heavy coat might seem faster, but it can run, sag, drip, or stay tacky.
Start with a light first coat. It may not fully cover the piece, and that is okay. The goal is to build coverage gradually.
Keep the sprayer moving before you pull the trigger, then release the trigger just after each pass. This helps prevent heavy spots at the beginning and end of each stroke.
On furniture with legs, trim, or corners, spray from different angles so you do not miss hidden edges. Watch for paint collecting in grooves or around raised details.
Let Each Coat Dry
Follow the paint label for dry time and recoat time. Temperature, humidity, paint type, and coat thickness all affect how long the paint takes to dry.
Do not rush the next coat if the first coat is still tacky. Adding more paint too soon can cause texture problems, smudging, or a soft finish.
Most furniture projects need at least two coats of paint. Dark furniture painted a light color may need more, especially if you did not use primer.
Add a Clear Topcoat if Needed
Some furniture paints are durable on their own, while others benefit from a clear topcoat. Tabletops, desks, shelves, cabinets, and high touch furniture often need extra protection.
Water based polyurethane, polycrylic style topcoats, furniture sealers, and clear coats can all be used depending on the paint and the final look you want. Always make sure the clear coat is compatible with the paint underneath.
If you spray a clear coat, use light coats and watch carefully for runs. Clear finishes can be harder to see while spraying, so good lighting helps.
Clean the Sprayer Right Away
Once you are done painting, clean the sprayer before the paint dries inside it. This is not the fun part, but it saves the sprayer.
Follow the sprayer manual and the paint label. Water based paint usually cleans up with water, while oil based products may need the recommended solvent.
Clean the cup, nozzle, tip, filter, pickup tube, and any parts that touched paint. A small sprayer cleaning kit is helpful for tight spaces.
Conclusion
Painting furniture with a sprayer can give DIY projects a smoother, cleaner finish than a brush or roller, especially on pieces with curves, trim, legs, drawers, or detailed edges. The best results come from careful prep; clean the furniture, sand glossy areas, repair damage, prime when needed, and test the sprayer before painting.
Take your time and build the finish with light coats instead of trying to cover everything at once. Once you get comfortable with the rhythm, a paint sprayer can make furniture makeovers feel easier, faster, and a lot more polished.
- Why Use a Paint Sprayer for Furniture?
- What Type of Paint Sprayer Works Best for Furniture?
- Choose the Right Paint
- Remove Hardware and Take the Furniture Apart
- Clean the Furniture First
- Sand the Surface
- Repair Small Damage
- Prime When Needed
- Set Up a Spray Area
- Test the Spray Pattern
- Spray Light, Even Coats
- Let Each Coat Dry
- Add a Clear Topcoat if Needed
- Clean the Sprayer Right Away
- Conclusion
- References
References
- Graco; How To Paint or Stain Home Furniture Using a Paint Sprayer.
- Wagner SprayTech; How to Paint and Stain Furniture.
- Rust-Oleum; Spray Paint Wood Furniture and Metal Furniture.