Spray painting metal seems simple enough until the paint starts peeling, bubbling, or scratching off a few days later.
I think that is where a lot of DIY projects go sideways.
The spray paint itself usually gets blamed, but most of the time, the real problem started before the first coat ever hit the surface..
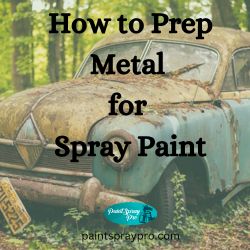
How to Prep Metal for Spray Paint
Metal needs prep.
Whether you are painting patio furniture, cabinet hardware, a metal railing, a light fixture, a mailbox, or an old garage sale find, the surface has to be clean, dull, dry, and ready to hold paint. If you spray over rust, grease, dust, glossy metal, or loose old paint, the new finish probably will not last very long.
The good news is that prepping metal for spray paint is not complicated. It just takes a little patience and the right supplies.
Why Metal Prep Matters Before Spray Painting
Metal is hard and smooth, which sounds like a good thing, but paint needs something to grip. If the surface is too slick, spray paint can sit on top instead of bonding properly. That can lead to peeling, flaking, uneven coverage, and a finish that scratches way too easily.
Proper prep usually means cleaning the metal, removing rust or loose paint, sanding glossy areas, wiping away dust, and using primer when needed. Krylon’s surface preparation guidance recommends starting spray paint projects with a clean, dry surface, removing loose rust or paint, sanding glossy surfaces, and wiping with a tack cloth before painting.
That is the basic idea behind almost every successful metal spray paint project; clean it, scuff it, prime it, then paint it.
Supplies You Will Need
You do not need a professional paint booth or a garage full of tools to prep metal for spray paint. For most DIY homeowners, a basic setup will do the job.
Good supplies to have on hand include:
- Dish soap or a mild degreasing cleaner
- Clean rags or shop towels
- Wire brush
- Sandpaper in medium and fine grits
- Sanding sponge
- Steel wool or abrasive pad
- Tack cloth or lint free cloth
- Painter’s tape
- Drop cloth or cardboard
- Rust inhibiting primer
- Spray paint made for metal
- Gloves and safety glasses
- Dust mask or respirator
- Mineral spirits for greasy residue, if appropriate for the project
These are also easy product categories to link to from Amazon. Sanding sponges, tack cloths, wire brushes, rust primer, spray paint handles, gloves, and drop cloths all fit naturally into this type of article.
Step 1: Remove Hardware and Loose Pieces
Before you start cleaning or sanding, remove anything that should not be painted. This may include screws, hinges, rubber feet, knobs, cushions, glass pieces, plastic caps, or decorative parts.
If you are painting something like patio furniture, take off cushions and fabric pieces. If you are painting a light fixture, remove the bulbs and glass. If you are painting cabinet hardware, take the pulls or knobs off the doors and place the screws in a small container.
This step makes the project easier and helps you avoid messy edges. It also lets you paint the metal more evenly from all angles.
Step 2: Clean the Metal Surface
Cleaning is the step people love to skip, but it is one of the most important parts of prepping metal for spray paint.
Metal can hold dust, oil, grease, fingerprints, wax, old cleaner, and outdoor grime. Spray paint does not bond well to dirty surfaces, so give the piece a proper cleaning first.
Wash the metal with warm water and mild soap or a degreasing cleaner. Scrub any greasy or dirty areas, then rinse with clean water and dry the surface completely. Rust Oleum’s clean metal primer instructions recommend washing the surface to remove dirt, rinsing with fresh water, drying with a clean cloth, and removing oil, grease, wax, and petroleum based material with mineral spirits.
Do not paint while the metal is still damp. Moisture trapped under primer or spray paint can cause bubbling, poor adhesion, and future rust problems.
Step 3: Remove Rust and Loose Paint
If the metal has rust, peeling paint, or flaky old finish, remove as much loose material as possible before painting.
Use a wire brush, sandpaper, sanding sponge, or steel wool to scrub away loose rust and old paint. You do not always have to strip the piece down to bare metal, but anything loose or flaky needs to come off.
For heavier rust, start with a wire brush or medium grit sandpaper. Once the rough rust is gone, smooth the area with finer sandpaper so the surface does not feel jagged under the new paint.
This matters even more for outdoor metal. Steel and wrought iron are more likely to rust when exposed to air and moisture, and Sherwin Williams recommends priming bare steel as soon as possible with a rust inhibiting primer or finish.
If the rust is deep, crumbly, or eating through the metal, spray paint can improve the appearance, but it will not magically repair the structure. In that case, the piece may need repair before painting.
Step 4: Sand Glossy Metal So Paint Can Grip
If the metal is shiny, smooth, or previously painted with a glossy finish, sand it lightly before priming or painting.
You are not trying to grind the whole piece down. You are just creating a slightly dull surface so the primer and spray paint can bond better. A fine grit sanding sponge works well for curved areas, edges, and detailed pieces.
For bare shiny metal, an abrasive pad or fine sandpaper can help knock down the slick surface. For previously painted metal, sand until the surface feels smooth and dull. Feather out any edges where old paint meets bare metal so the new paint does not highlight ridges.
After sanding, wipe the piece clean with a tack cloth or lint free cloth. Dust left behind can create bumps, rough texture, and poor adhesion.
Step 5: Decide Whether You Need Primer
Primer is one of those steps that feels optional until the paint starts failing. For many metal projects, primer is worth using.
Use primer if:
- The metal is bare steel or iron
- The piece will be used outdoors
- You removed rust
- The old paint was peeling
- The metal is dark and you are painting it a lighter color
- You want the finish to last longer
- The spray paint label recommends primer
Exterior metal usually benefits from primer, especially if rust protection matters. Krylon recommends priming metal to protect against rust and says exterior metal should be primed for the greatest durability.
For iron, steel, wrought iron, and cast iron, choose a rust inhibiting primer. For aluminum, brass, copper, or galvanized metal, read the paint label carefully because some metals need a specific primer to bond properly.
Step 6: Tape and Protect Anything You Do Not Want Painted
Once the surface is clean, sanded, and ready, mask off anything that should stay paint free.
Use painter’s tape for edges, labels, glass, handles, or nearby surfaces. Place the project on a drop cloth, cardboard, or scrap wood. Spray paint travels farther than people expect, so protect the surrounding area.
If you are spraying outside, choose a calm day if possible. Wind can blow dust into the finish and carry overspray onto nearby surfaces. Direct sun can also make the paint dry too fast on hot metal, so a shaded, well ventilated spot is usually better. Krylon recommends avoiding direct sunlight when spray painting metal and checking the can label for the best temperature range.
Step 7: Apply Primer in Light Coats
Shake the primer well and test spray on cardboard before spraying your project. Hold the can the distance recommended on the label, then use smooth passes across the surface.
The trick is to spray light coats. Heavy coats can drip, wrinkle, or take much longer to dry. Start each pass slightly off the object, move across the surface, then release after you pass the other edge. This helps avoid heavy spots at the beginning and end of each stroke.
Let the primer dry according to the label before adding paint. If the surface feels rough after the primer dries, lightly sand it with fine grit sandpaper and wipe away the dust.
Step 8: Spray Paint the Metal
Once the metal is clean, sanded, primed, and dry, you can spray paint.
Apply several light coats instead of one heavy coat. Keep the can moving and overlap each pass slightly so the finish looks even. Krylon recommends applying several light coats and using a smooth, even sweeping motion while slightly overlapping each pass.
Let each coat dry according to the product label before adding another. Dry time depends on temperature, humidity, paint type, and how heavily you sprayed.
If you are painting both sides of a small item, let the first side dry before flipping it over. Rushing this part can leave fingerprints, smudges, or marks in the finish.
Common Mistakes to Avoid
The biggest mistake is spraying over dirt, grease, or rust and hoping the paint will hide it. It might look fine for a day, but the finish will probably fail faster.
Another common mistake is spraying too much paint at once. Heavy coats can run, sag, bubble, or stay soft longer than expected.
Do not skip sanding glossy surfaces. Smooth metal may look clean, but it still needs a little texture so the paint can grip.
Do not mix random products without checking the labels. Primer, spray paint, clear coat, and metal type all need to work together.
A spray paint can handle is a nice add on for beginners because it can make the can easier to control and reduce finger fatigue during larger projects.
A Quick Safety Note
Wear eye protection and work in a well ventilated area, especially when sanding, priming, or spraying. Paints, solvents, and leftover chemical products may require special disposal, and the EPA notes that some household products such as paints, cleaners, and oils can contain hazardous ingredients and should be handled with care.
Conclusion
Prepping metal for spray paint is not hard, but it does make a huge difference. A few extra minutes spent cleaning, sanding, removing rust, and priming can be the difference between a smooth finish that lasts and a project that starts peeling almost immediately.
Start with a clean, dry surface. Remove rust and loose paint. Sand anything glossy. Wipe away the dust. Use the right primer when needed. Then spray several light coats instead of trying to cover everything in one pass.
That is really the whole formula.
If you are a DIY homeowner painting patio furniture, cabinet hardware, railings, light fixtures, or small decor pieces, good prep is what gives your spray paint the best chance to look smooth, bond properly, and hold up over time.
- How to Prep Metal for Spray Paint
- Why Metal Prep Matters Before Spray Painting
- Supplies You Will Need
- Step 1: Remove Hardware and Loose Pieces
- Step 2: Clean the Metal Surface
- Step 3: Remove Rust and Loose Paint
- Step 4: Sand Glossy Metal So Paint Can Grip
- Step 5: Decide Whether You Need Primer
- Step 6: Tape and Protect Anything You Do Not Want Painted
- Step 7: Apply Primer in Light Coats
- Step 8: Spray Paint the Metal
- Common Mistakes to Avoid
- A Quick Safety Note
- Conclusion