If your paint sprayer is leaving lines, streaks, or heavy edges, it usually means the paint is not being sprayed evenly.
This can show up as two darker lines on the outside of the spray pattern, thin stripes across the surface, patchy coverage, or a finish that looks uneven after it dries.
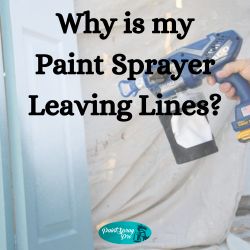
Why Is My Paint Sprayer Leaving Lines?
The good news is that this is a very common paint sprayer problem, especially for beginners. Most of the time, it comes down to pressure, paint thickness, clogged parts, the wrong spray tip, or how the sprayer is being moved across the surface.
What Do Paint Sprayer Lines Look Like?
Paint sprayer lines can show up in a few different ways. Sometimes they look like stripes between each spray pass. Other times they look like darker lines on both edges of the fan pattern. These edge lines are often called tails or fingering.
You may also notice one side of the spray pattern looks heavier than the other. That can make the finish look blotchy, especially on cabinets, doors, trim, fences, walls, and furniture.
Before you change everything at once, spray a test pattern on cardboard. This helps you see whether the problem is coming from the sprayer setup or your spraying technique.
The Pressure May Be Too Low
One of the most common reasons a paint sprayer leaves lines is low pressure. When the pressure is too low, the sprayer may not break the paint into a fine enough mist. Instead of a soft, even fan, you get heavy edges.
This is especially common with airless sprayers. If you see two lines on the outside edges of the spray pattern, slowly increase the pressure and test again on cardboard. You want the lowest pressure that gives you a clean, even pattern.
Do not just crank the pressure to maximum right away. Too much pressure can create extra overspray and waste paint. Increase it gradually until the lines disappear.
The Paint May Be Too Thick
Paint that is too thick can also cause lines, sputtering, and uneven coverage. This often happens with latex paint, primer, cabinet paint, and thicker exterior coatings.
If the sprayer is struggling to push the paint through the tip, the spray pattern may look uneven no matter how carefully you move. Check the paint label and sprayer manual before thinning. Some paints can be thinned with water; others need a specific thinner; some should not be thinned at all.
A simple paint strainer can also help. Even if the paint looks smooth in the can, small dried bits can clog the tip and ruin your pattern.
The Spray Tip Could Be Clogged
A partially clogged spray tip can make your sprayer leave lines almost instantly. The paint may come out unevenly, spray heavier on one side, or leave a broken fan pattern.
If your sprayer has a reversible tip, follow the manual to clear it. Usually, this means turning the tip to the unclog position and spraying into a waste bucket for a moment. Then turn it back and test again.
If you are using an HVLP or handheld sprayer, remove the nozzle and clean it carefully. A spray gun cleaning kit with small brushes and cleaning needles is useful here, but do not force metal objects into precision openings. Scratching or enlarging the tip can make the pattern worse.
The Filter May Be Dirty
A dirty filter can restrict paint flow and create an uneven spray pattern. Many beginners check the tip first but forget the gun filter, inlet strainer, or cup filter.
If the filter is packed with dried paint, primer, dust, or debris, the sprayer may not get a steady flow of material. That can cause lines, pulsing, spitting, or weak coverage.
Remove the filter and clean it according to your sprayer manual. If it does not clean up properly, replace it. Filters are much cheaper than fighting a bad spray pattern through an entire project.
You Might Be Using the Wrong Tip Size
The spray tip controls how much paint comes out and how wide the spray fan is. If the tip is too small for the paint, the sprayer may struggle and leave tails. If the tip is too large for the project, you may get too much paint on the surface.
For thicker paints and primers, you may need a larger tip opening. For cabinets, furniture, doors, and trim, you may need a finer finish tip that gives better control.
This is why one tip does not work perfectly for every project. A fence, cabinet door, wall, and furniture piece may all need different setups.
The Tip May Be Worn Out
Spray tips do not last forever. As a tip wears, the opening gets larger and the spray pattern becomes less precise. That can lead to uneven coverage, more overspray, and a poor finish.
A worn tip may also make you think your technique is the problem when the tool is really the issue. If your sprayer used to work well and now leaves lines even after cleaning, the tip may need to be replaced.
For DIY homeowners, this is an easy thing to overlook because the tip may still spray paint. But spraying paint and spraying it evenly are not always the same thing.
Your Spray Passes May Not Be Overlapping Correctly
Sometimes the sprayer is working fine, but the lines are coming from uneven overlap.
Each pass should slightly overlap the previous pass. If you leave gaps, you will see stripes. If you overlap too much, you may get heavy bands of paint.
A good beginner habit is to overlap each pass by about half of the spray pattern. Keep the sprayer moving at a steady speed and distance from the surface.
Start moving before you pull the trigger, then release the trigger after you pass the edge. This helps avoid heavy spots at the beginning and end of each stroke.
You May Be Spraying Too Close or Too Far Away
Distance matters. If the sprayer is too close, the paint can go on too heavy and create lines, runs, or puddles. If it is too far away, the paint may dry before it lands evenly, leaving a rough or patchy finish.
Try to keep the sprayer the same distance from the surface through the whole pass. Do not swing your wrist in an arc. Move your whole arm so the sprayer stays parallel to the surface.
This is especially important on doors, cabinets, walls, and furniture because uneven distance can show up quickly on smooth surfaces.
How to Fix Paint Sprayer Lines
Start with the easy checks first. Spray a test pattern on cardboard. If you see tails, slowly increase the pressure until the fan looks even. If the pattern is broken or heavier on one side, clean the tip and filter.
Next, check the paint thickness. Strain the paint, then thin only if the product label and sprayer manual allow it. If the tip is worn or wrong for the material, switch to a better size.
Once the spray pattern looks good, practice your technique. Keep the sprayer straight, move at a steady pace, and overlap each pass evenly.
Conclusion
If your paint sprayer is leaving lines, do not panic and do not assume the whole project is ruined. Most lines come from low pressure, thick paint, clogged tips, dirty filters, worn tips, wrong tip size, or uneven spraying technique.
The best fix is to slow down and test one thing at a time. Start with a cardboard test pattern, clean the tip and filter, adjust the pressure, check the paint thickness, and practice your overlap. Once the sprayer is set up properly, the finish should look much smoother and more even.
- Why Is My Paint Sprayer Leaving Lines?
- What Do Paint Sprayer Lines Look Like?
- The Pressure May Be Too Low
- The Paint May Be Too Thick
- The Spray Tip Could Be Clogged
- The Filter May Be Dirty
- You Might Be Using the Wrong Tip Size
- The Tip May Be Worn Out
- Your Spray Passes May Not Be Overlapping Correctly
- You May Be Spraying Too Close or Too Far Away
- How to Fix Paint Sprayer Lines
- Conclusion
- References
References
- Graco; Magnum and TrueCoat frequently asked questions; guidance on clearing tip clogs and using the lowest pressure that creates a complete spray pattern.
- Graco; How to Start Up an Airless Paint Sprayer; guidance on heavy edges, also called tails, and adjusting pressure for a softer spray pattern.
- Wagner SprayTech; How to Clear a Clogged Sprayer Tip; troubleshooting guidance for clogged tips and inconsistent spray patterns.